Linux Ubuntu 10.04 - 10.10

ADMINISTRATOR
Učlanjen(a)
10.05.1971
Poruka
54.331
how to install adobe flash player in ubuntu 10.04-10.10

adobe_flash_player2.png


Adobe flash player is necessary for modern browsing experience because more than 65% of the websites on the Internet have flash contents.For playing youtube video you need latest version of adobe flash.After the fresh installation of ubuntu 10.04,you can install the adobe flash player(It will work For atleast these browsers-Mozilla,Crome,Opera,SeaMonkey and Midori) by following these steps :


step1 : Download the .deb package fr0m the adobe’s website.Its size is 3.84 MB.
Download URL :


Kod:
http://get.adobe.com/flashplayer/


step2 : If you have selected the default option at the time of downloading like -”Open with – Gdebi package installer” then installation will be automatically started after the completion of downloading,otherwise go to the location of downloaded file and right-click(default) on it to open with “Gdebi Package Installer”.


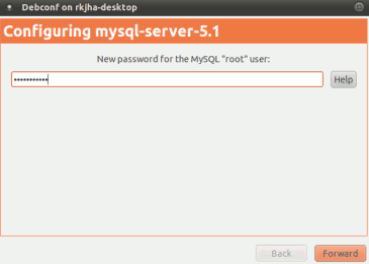
step3 : After some moments an option- “Install package” will appear on the right corner of a window.Click on “install package”,it may asks for user password,if so then enter your user account(Ubuntu login) password.


step4 : Wait for few minutes until the installation will complete.Now, Open the browser and open youtube.com to play a video.If no problem is there, then your work is done otherwise click on reinstall the package.


step5 : That’s all ..I hope you installed the adobe flash successfully in your Ubuntu 10.04 LTS(Lucid Lynx).
 
ADMINISTRATOR
Učlanjen(a)
10.05.1971
Poruka
54.331
gtalk for ubuntu 10.10

google_talk_for_ubuntu_10-10.jpg


Google Talk or in short gtalk is an instant messaging and voice chat application developed by Google.Officially it’s available for windows or Mac-OS X only but you can use web based gtalk from your gmail by installing a simple plugin in Mozilla Firefox.If you want desktop based application then there are two ways :


gtalk-on-ubuntu.png


#1 : Install Google Talk Prism in Ubuntu 10.10


Open Synaptic Package Manager and search for ‘google talk’ or ‘gtalk prism’ or ‘google talk prism’ and select the required package and don’t forget to click on yes if it prompt for additional dependencies(after checking the box).Then click on Apply button to installation the selected packages.It will hardly take a couple of minutes.That’s all ..your prism web application for gtalk is ready to use;open it from Applications –> Internet –>Google Talk Prism and enter your account details to begin.
#2 : Installing Google Talk using Wine

First Install Wine and then open the google talk executable(*.exe) with Wine Windows Program Loader to install gtalk in Ubuntu 10.10(Maverick Meerkat).Rest of the steps are similar to above.
 
ADMINISTRATOR
Učlanjen(a)
10.05.1971
Poruka
54.331
how to install wine on ubuntu 10.04 - 10.10

install_wine_on_ubuntu_10_04.jpg


Wine is a compatibility layer to run windows applications/softwares on Linux based OS like Ubuntu 10.04(Lucid Lynx)/9.10/10.10.The most important fact is that the applications doesn’t required CPU emulation and run at full speed.The Wine can be installed in Ubuntu 10.04 by using command line or Synaptic Package Manager.Wine package contains a program loader which is used to run windows executables(*.exe).
Installing Wine in Ubuntu 10.04 by using Synaptic Package Manager
1. Open Synaptic Package Manager and search for ‘wine’.
2. Then select the row which contains wine 1.2 and mark the package(by checking box) for installation; and click on ok if it asks for dependencies.
3. Next,click on Apply to install wine and wait ….until the installation is completed.
4. Now,you are ready to use wine.
Install Wine from Command Line(Terminal/shell)

To install wine from command line,first open the terminal(In Ubuntu 10.04,just hit CTRL+ALT+T) and type the command given below

sudo apt-get install wine


Using Wine on Ubuntu 10.04/9.10
After successful installation of wine on Ubuntu 10.04(Lucid Lynx),you can open it from Applications->Wine OR just right click on windows executables(.exe) and select ‘Open With Wine Windows Program Loader’.
 
ADMINISTRATOR
Učlanjen(a)
10.05.1971
Poruka
54.331
how to install MySQL on ubuntu 10.10

On Ubuntu 10.10(Maverick Meerkat) MySQL(server/client) Database Management System is recommended because it’s free,open source,fast and easy to install.MySQL is one of the most widely used DBMS specifically for web development.PHP+MySQL is a De Facto standard for creating dynamic websites.The most widely preferred cms(Content Management System) i.e wordpress(This blog is also running on wordpress) also uses PHP+MySQL to generate dynamic pages.


Installing MySQL in Ubuntu 10.10

installing-mysql-ubuntu-1010.png


#1. Open Synaptic Package Manager and search for ‘mysql’ or ‘mysql 5’ and select the packages(client and server) you need.


#2. Then click on Apply button to begin the installation procedure.In the middle of the installation you will be prompted for MySQL root password,set strong password for MySQL server.You will need this password for logging to your MySQL server account,with administrative power.


mysql-root-password.png


#3. Next installation will complete within a minute.You can start using your server/client now.Open terminal and Type the following command :


mysql -u user -h host –p //Then Enter the User’s Password

In this scenario,the user is ‘root’ and in host use ‘localhost’;so the actual command will be


mysql -u root -h localhost –p

mysql-ubuntu-1010-snapshot.png


That’s All…I hope,Now you are enjoying MySQL..don’t forget to comment specially in case of any problems related to MySQL and Ubuntu 10.10.
 
ADMINISTRATOR
Učlanjen(a)
10.05.1971
Poruka
54.331
how to install picasa in ubuntu 10.10

picasa-ubuntu-1010.jpg


This post will explain about some basic features of Picasa (=+Web Albums) along with the installation details on Ubuntu 10.10 Maverick Meerkat.Picasa is a photo sharing/editing application developed by Google.Picasa allows you to organize all your pictures/photos in efficient/fast way.It’s free to use and 1GB(Giga Bytes) of free space is provided if you use Picasa web Albums.Picasa is available for Windows(xp/vista/7),GNU/Linux(e.g Ubuntu,Fedora,Linux Mint) and Mac OS X.


Installing Picasa on Ubuntu 10.10 Maverick Meerkat


The most simple way to install Picasa on Ubuntu would be to get the debian(*.deb) executable for Picasa.Simply follow the steps –


#1 : Download Picasa


download Picasa for Ubuntu 10.10


#2 : Install Picasa
Go to the location where you have saved the *.deb file and Right Click –> Open with Ubuntu Software Center,then click on install button and wait for the installation to complete.


installing-picasa.jpg


#3 : Enjoy Picasa
Now,you can open Picasa from Applications –> Internet –> Picasa,then accept the license terms and select preferences…that’s All.
Important features of Picasa at a Glance

*Organize Photos in easily
*Good interface with Lot of fun effects
*Easy Sharing of Photos
*Edit pics. as you want
…..go to it’s official website for more details(link is given above).
 
ADMINISTRATOR
Učlanjen(a)
10.05.1971
Poruka
54.331
how to install google chrome on ubuntu 10.10

google-chrome-logo-3.jpg


Google Chrome is nothing but a modified version of chromium, an open source web browser.So On Ubuntu 10.10 Maverick Meerkat you can also install Google Chromium from Software Center but Google Chrome has few extra features so you may want to try that.O.K,this post will explain you how to install Google chrome in Ubuntu 10.10 although it works for other debian based GNU/Linux system too.Google Chrome is the fastest browser on this planet..so without any delay ..go to the steps and install Chrome.
Although Ubuntu 10.10 comes with Firefox,installed by Default,the most popular open source browser in the world but it’s loosing it’s popularity due to some reasons.So in the upcoming versions of Ubuntu you may see Google Chrome as Default web browser.Number of features and the users share is also increasing rapidly for Google Chrome.Now,a lot of plugins are also available so that you can add some custom functionality to the browser.


step #1 : Get Google Chrome Debian package(*.deb)

Download the Google Chrome from the link given below.


Download Google Chrome
step #2 : Install Google Chrome

After downloading the .deb file from the above link,open the .deb package with Ubuntu software center,then click on install button to begin installation procedure.Wait for the installation to complete.
step #3 : Enjoy Google Chrome

That’s All ..you are done..open Applications->Internet->Google Chrome and enjoy fast browsing with Google Chrome.
 
ADMINISTRATOR
Učlanjen(a)
10.05.1971
Poruka
54.331
how to install Google Earth in ubuntu 10.04-10.10

google-earth-logo.jpg


If you have any problem in installing Google Earth in Ubuntu 10.04(Lucid Lynx) then this post will solve the problem..it’s very easy …and will take less than a minute(Excluding Downloading Time).Just follow the steps given below.
Google Earth is a desktop applications which has derived features from Google Map,and of-course developed and maintained by Google.By Using Google Earth you can visualize the earth in 3D mode,and it allows you to interactively navigate satellite imagery,maps,terrain and other things.The other important features is that you can search for a location,find a path from one point to other.The zooming effect(Requires 3D acceleration and High Bandwidth Internet Connection) is really very good.Actually Debian packages which supports well with Ubuntu,aren’t available instead you have to install it from *.bin package,provided by Google for Linux Platform.


How to install Google Earth in Ubuntu 10.04 – 10.10

#1 : Download the binary package,’GoogleEarthLinux.bin’ for Linux/Ubuntu from the official website.

Download Google Earth


#2 : Open Terminal(CTRL+ALT+T),go(Use CD Command) to the directory where you have saved the downloaded file and make the bin file executable by typing the command -
$ chmod +x GoogleEarthLinux.bin

#3 : Next,begin the installation by typing the command(followed by a single click on Install)
$ ./GoogleEarthLinux.bin

#4 : After completing the installation procedure successfully,you will notice a desktop shortcut/launcher for Google Earth.If you will double click on it then,it will start the application(Google Earth);but you may have to change it’s permission(If any error occurs).If so then run the command(Don’t forget to change the directory,if needed) -
$ chmod +x Google-googleearth.desktop Alternative Method : Open Ubuntu Software Center or Synaptic Package Manager and search for “google earth” and select the package to install.It should also work.Try it and send me your feedback through comments.


google-earth-snapshot-in-ubuntu.jpg
 
ADMINISTRATOR
Učlanjen(a)
10.05.1971
Poruka
54.331
how to install gyachi in ubuntu 10.10

gyachi-on-ubuntu-10-10.png


Gyachi(GyachE Improved) is nothing but a yahoo(messenger) client for Linux based operating system e.g Ubuntu 10.10(Maverick Meerkat).It’s free and open source equivalent of yahoo messenger.It has all the features that you expect,like voice chat,avatars,nicknames,webcams.Gyachi’s GUI is developed using GTK(GNU Tool Kit),so gtk 2.0.6 or better is required.


Installing GyachI on Ubuntu 10.10

Installation of Gyachi on Ubuntu 10.10,can be divided in two parts one installation of dependencies/libraries and second the gyachi data && application.The detail explanation is given below –
step #1 : Install libgtkhtml 2-0

gtkHTML is a lightweight engine to render,print and edit HTML; Gyachi need this libraries to be installed so first download *.deb packages from here


Kod:
http://packages.debian.org/lenny/i386/libgtkhtml2-0/download


and open with software center to install.
step #2 : Install GyachI

Now,you can download gyachi packages(first two packages is necessary) from this link


Kod:
https://launchpad.net/~loell/+archive/ppa/+build/1806226


and open with software center;click on install button..and wait for the installation to complete.
To access Gyachi go to Applications –> Internet –> GyachE Improved and enter your yahoo account details to begin.
 
ADMINISTRATOR
Učlanjen(a)
10.05.1971
Poruka
54.331
how to enable 3D desktop effects in ubuntu 10.10

3d_desktop_effects_in_ubuntu_10_10.jpg


Ubuntu 10.10 Maverick Meerkat or any Linux Based Operating System which uses GNOME or KDE as Desktop can enable funky 3D effects in a couple of clicks.So this post will eventually lead to the explanation of 3D effects on Ubuntu 10.10.To generate some elegant 3D effects ‘Compiz’ is used.Compiz is a compositing manager or in other words compiz enhances the overall user interaction by adding some fancy effects to your windows e.g Desktop Cube or Expo view.The other important point is that this will run with almost any hardware configuration.
On Ubuntu 10.10,compiz is partially installed only few components needed to be installed in order to work everything properly.Compiz Configure Settings Manager(CCSM) is specifically required to configure and manage the 3d effects.You can install it either from Command Line or from Synaptic Package Manager.


From Command Line

Open the terminal and Type the following command in the terminal followed by your ubuntu login password.
sudo apt-get install compiz compizconfig-settings-manager That’s All ..you are done!


From Synaptic Package Manager

Search for ‘ccsm’ or ‘compiz’ in the quick search bar of Synaptic Package Manager.Then Mark the packages you Required and click on ok if it asks for dependencies.Next,click on Apply button to begin the installation procedure….and wait until the installation step is finished.


Configuring Compiz for 3D Effects

After installing compiz and it’s other components like setting manager you need to configure it i.e you have to select which features you want or not if yes then how…..Rest of thing is self explanatory just move to System->Preferences->CompizConfig-Setting-Manager and change the settings as you like ..in a couple of clicks.I think you are enjoying funky 3D effects …still confused ..see here 3D Effects in Ubuntu.
 
ADMINISTRATOR
Učlanjen(a)
10.05.1971
Poruka
54.331
3D Desktop Effects in Ubuntu 10.04-10.10

3d_desktop_effects_in_ubuntu_10_04.jpg


Source :


Kod:
http://www.compiz.org/


Ubuntu 10.04 LTS(Code Named as Lucid Lynx) is gaining popularity very rapidly and now it is probably the best linux distro that focuses on desktop experience.When we talk about desktop experience then it can’t be completed without describing about the advanced 3D desktop effect that can be achieved by using some software and hardware(Graphics Card).So this post is going to explore about some cool and pleasant desktop effects which can be enabled in ubuntu 10.04 very easily(So I assume that you have already a good graphics card for enjoying all the 3D effects if no then it is recommended to buy one).

Compiz : For Cool Desktop Effect in Ubuntu 10.04-10.10

3D Desktop effects are done on any linux platform(Here Ubuntu 10.04) by using a software – Compiz window manager in the supported desktop environment.So Compiz is extensively used to produce cool and impressive effect in the windowing environment by using the graphics card’s processing power.You can also add some more functionality to the Compiz with the help of plugins.


compiz_settings_ubuntu_10_04.jpg


How to Install Compiz in Ubuntu 10.04-10.10

In the Ubuntu 10.04 LTS,Compiz is installed by default otherwise go to Synaptic Package Manager(System->Administration->Synaptic Package Manager) and search for Compiz and click to install.


Installing Compiz-Config-Settings-Manager in Ubuntu 10.04 -10.10

Ubuntu 10.04 users have to install only one supporting software CCSM(CompizConfig-settings-Manager) from the Synaptic Manager,for controlling(Enable and Disable) the desktop effect .After checking the box for installation click on apply changes to install it.Now you are ready to enjoy cool 3d desktop effects.First go to ccsm(System->Preferences->CompizConfig-Setting-Manager) and now you are able to enjoy.Select the features and effects you want(By checking the box).Adjust the settings according to your desktop environment either GNOME or KDE.There are so many options click and try..do some experiment on them then you will know better about the effects and it will surely help you in learning more about some funny and cool effects.That’s all.
 
Natrag
Top