Linux Ubuntu 10.04 - 10.10

ADMINISTRATOR
Učlanjen(a)
10.05.1971
Poruka
54.331
how to install samba on ubuntu 10.04-10.10

Samba is a software implemented on SMB/CIFS protocol for Unix and Linux based systems.It provides support for all common platform like windows ,linux(Ubuntu 9.10 or 10.04,open-suse,fedora,debian…),Mac so that you can share file and printers among your computers without any problem.Samba is an open source and free software.Samba is also used as NT4 style Domain control.On Ubuntu 10.04 you can install samba from command line or Synaptic Package Manager or Ubuntu Software Center.The Latest stable version of samba server is 3.5.4 and is available for download.

install_samba_on_ubuntu_10_04.jpg


Installing Samba on Ubuntu

1. Open Ubuntu Software Center and search for “samba”.


2. Next,click on install(In the row which contains the packages you want to install,first and second results are ok for general purposes,but if you want some extra features like Mounting Remote File system,then install some extra packages-smbfs from Synaptic Package Manager).


3. Wait until the installation is complete.(It will take a couple of minutes only)


4. That’s All.


Configure Samba

You can configure it from command line by using the command

gksu system-config-samba


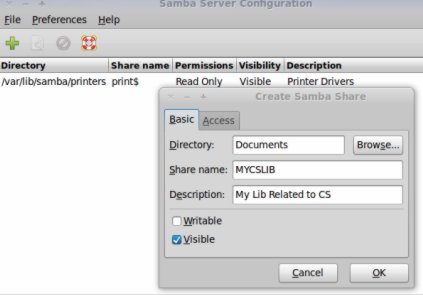
Then configure the settings according to your need.You can also create a menu for samba in Applications->Accessories or a shortcut startup icon on taskbar by using Application Finder(search for “samba”,left click and drag it to task bar).Now,click on “+” then on Basic Tab and symbol to share some file and enter the details like Directory,share name,description and most important one access mode i.e visible or writable.Then click on access and Define who can access that file.(Every One or selected users only)
 
ADMINISTRATOR
Učlanjen(a)
10.05.1971
Poruka
54.331
how to install calibre on ubuntu

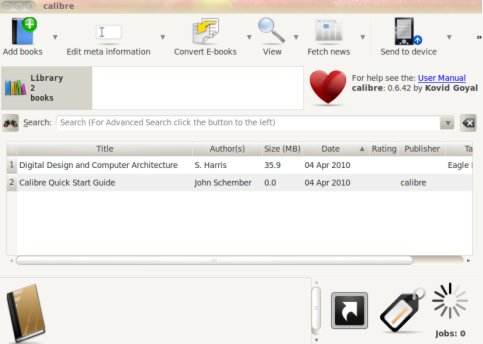
Calibre is an ebook library management software.This post will explain you about installing calibre(ebook collection manager) on Ubuntu OS(the process is same for almost all versions like ubuntu 9.10/10.04/10.10 …and others).Calibre is an open source and free application and in ubuntu you can find it in software center or package manager.You can also download and install it manually from it’s official website


Kod:
http://calibre-ebook.com/


.Calibre has support for wide range of formats,some most common formats are *.pdf,*.mobi,*.epub,*.html,*.odt,*.lit,*.txt.It’s very easy to import books from one platform to other (in couple of clicks) by using calibre.
Install ebook library management software calibre on ubuntu

From Command Line

#1. Open Terminal/shell;type the command(enter ubuntu login password if required) and enter y(when prompted for installation)


~$ sudo apt-get install calibre

#2. Wait until the installation is complete.


From Ubuntu Software Center

#1. Open Ubuntu Software Center and then move to Get Software -> Office and click on install in calibre row.

#2. Enter password if required and then wait for few minutes for the installation to complete.


calibre_snapshot.jpg


Conclusion : Calibre is one of the most popular ebook management application;due to the various formats support it’s known as universal ebook reader.After the completion of installation you can access it from Applications->Office->Calibre.
 
ADMINISTRATOR
Učlanjen(a)
10.05.1971
Poruka
54.331
Foxit Reader for Ubuntu 10.04-10.10

foxit_reader_for_ubuntu_10_04.gif


Ubuntu 10.04 comes with Document Viewer(Installed by default) which is a robust application(Good for reading e-book or pdf document) so it is not necessary to search for any other e-book reader.But one fact is that- Document Viewer is a basic application designed for general purposes uses and contains only the basic features like text selection,text search,zoom and others.If you have ever used Foxit Reader in windowsXP or 7 then you will feel the difference between Foxit reader and document viewer.Foxit reader is an excellent pdf reader with many advanced features and it is available free for all platforms(Linux,window..).That’s why you would like to use Foxit reader on ubuntu 10.04 too.Foxit Reader is also available FREE for Linux operating system in different package format(e.g debian package is available for Ubuntu) and installing procedure is extremely simple! Just few steps..


How to Install Foxit Reader in Ubuntu 10.04 :

step1 : Go to the download page of foxit software’s official website.

Download Foxit Reader


step2 : On the website search for the text “Foxit Reader for Desktop Linux”.Just Below- click on more download.Then different package options will come.Select .deb(3.61MB).


installing_foxit_reader_in_ubuntu.jpg


step3 : Now a small window will appear with the message similar to “Open with GDebi Package Installer”,Click OK.Now downloading will begin and wait for the download to complete.When the download will complete then a window will open automatically(as in above picture).click install package to install the foxit reader.It will take few seconds.


step4 :
Foxit reader is now installed on your computer.To open it you may go to Applications->Office->Foxit Reader or right click on the pdf Document and click on “Open with Foxit Reader”.


step5 : End of The Statement..Now Enjoy reading books with Foxit Reader!!
 
ADMINISTRATOR
Učlanjen(a)
10.05.1971
Poruka
54.331
E-mail client for Ubuntu 10.04-10.10

email_client_for_ubuntu_10_04.jpg


Ubuntu 10.04 users who have come from the windows-xp or vista or 7 may be searching for a suitable mail client like Microsoft outlook.In Linux/Ubuntu world there are lot of mail client available in contrast to the outlook.In this post I will try to explore an excellent e-mail client,that is probably the best.Although the evolution,a robust application,is installed as default mail client in ubuntu 10.04.But it is not necessary that every user should stuck to a single application where ,a lot of applications are waiting with some unique features.So you can try different mail clients and after that choose whatever you like.(Don’t forget to do some experiment in linux/Ubuntu;then surely you will enjoy and learn more)


Mozilla Thunderbird : The best Mail Client for Ubuntu 10.04 LTS

This is an robust e-mail client developed by Mozilla foundation.Since it is free and open source you can install it on your Ubuntu 10.04 very easily.It has a lot of features like easy mail account setup,tabs,e-mail archiving,folders to manage you e-mails more efficiently.It’s latest version 3.04 has released and you can install it on your system.It is a cross platform mail application i.e you can install it on Ubuntu or other Linux distribution as well as on Windows and MacOS.It’s new version cam with a lot of features and it is very fast and flexible because its functionality can be easily extended through plugins(A lot of plugins are available free on the Internet).It gives a great attention on security i.e you can easily set up encrypted connections with your mail server so that your mail account password and other sensitive information can’t be filtered through sniffing or Man in Middle attack.

Go to its official website for more details on its features


How to install Mozilla Thunderbird in Ubuntu 10.04

Actually the installation is very simple and it will take les than few minutes to complete,in ubuntu 10.04 LTS.There are many ways to install Thunderbird – using command line or By using Ubuntu Software center or by using Synaptic Package Manager.Installing Thunderbird from Ubuntu Software Center is very simple.


1.First,Open Ubuntu Software Center(Application->Ubuntu Software Center).

2.Search for Thunderbird.

3.Click on install.

4.It may ask you to authorise first if so then enter your password(Ubuntu login account) to begin downloading installation process.

5.Wait for the installation to complete.

6.You are done! Now open the Mozilla Thunderbird from Application->Internet->Mozilla Thunderbird Mail/News to configure your mail account(s).Enter the required information like mail account ID,password etc.That’s all…
 
ADMINISTRATOR
Učlanjen(a)
10.05.1971
Poruka
54.331
Antivirus software for Ubuntu

Actually there aren’t so many options available in choosing right antivirus software(in comparison to other applications) on Ubuntu 9.10 or 10.04 because Linux based operating system is not vulnerable to the most of the viruses and *wares(Due to the Fact that,Some years ago,only windows XP or other windows NT based operating system were suitable for common users so crackers and virus programmers had busy in creating viruses for windows OS.Another reason is that Linux based operating systems are much secure than windows).


antivirus_for_ubuntu.jpg


But know things has changed and now Ubuntu 10.04 Lucid Lynx is becoming popular among common desktop users(for Home use as well as professional purposes due to the benefits of Open Source tools).That’s why It is a good idea to use antivirus tools in Ubuntu 10.04.Some Common and most recommended antivirus software for Ubuntu 10.04 is ClamAV and Avast.
 
ADMINISTRATOR
Učlanjen(a)
10.05.1971
Poruka
54.331
Install Avast on Ubuntu

avast_for_ubuntu.png


In fact Ubuntu 10.04 or any other Linux based systems are not so vulnerable to viruses and worms because most of these malicious programs were developed for windows platform with .exe executables so they are harmless for ubuntu 10.04.One more fact is that,Ubuntu(or any GNU-Linux OS) security policy and strategy is very secure as compare to other operating system like windows and mac.So If you want to install antivirus software for scanning other media or other drives then Avast Antivirus is a good choice.
Avast antivirus has many edition like FREE,PRO and others but FREE edition is sufficient for common Internet users.


How to Install Avast Antivirus software on Ubuntu 10.04


1. Download avast(FREE Version) from its official website(click below on the download link and then a window will appear-save the .deb file on your computer).

Download Avast for Ubuntu


2. Go to download(or other location where you have just downloaded the avast debian package );Then Open avast4workstation_1.3.0-2_i386.deb with Gdebi package Installer and then click on install Package.


3. Wait until the installation is complete(it will take less than a minute).


4. Now to use avast you will need a valid License Key(Click below and register,they will send you a valid license key by e-mail within 24 hours).

Click here to obtain free license key from avast


5. After getting the key, Go to Applications->Accessories->avast! Antivirus and enter the license key.


6. That’s All…Avast is installed successfully on your ubuntu 10.04.
 
ADMINISTRATOR
Učlanjen(a)
10.05.1971
Poruka
54.331
how to Install NetBeans on Ubuntu 10.04-10.10

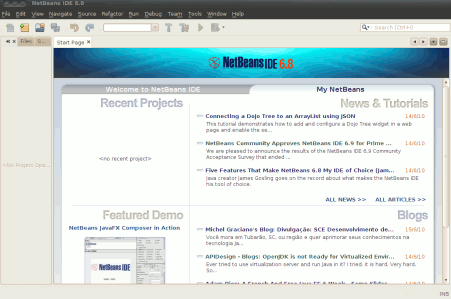
NetBeans IDE(Integrated Development Environment) is a great tool for developing software and web applications.Basically it supports java i.e it contains IDE for java,java development tools and plugins.You can also use NetBeans for C/C++ ,PHP,Ruby(+Rails)..and others by using plugins.NetBeans is free and Open Source application and it is available for all the platforms e.g Linux,Windows,Solaris,MacOSX.For developing desktop and mobile applications by using java,NetBeans is the best IDE.You can easily create applications(Desktop,Mobile,Web) through NetBeans in visual environment.For developing java based applications JDK is required but if you are using netbeans for other programming language then it is not required.


install_netbeans_on_ubuntu_10_04.jpg


Installing NetBeans IDE v6.8 on Ubuntu 10.04


1.Open Ubuntu Software Center(USC) from Applications.


2.Now search for “netbeans” in the top-right search bar.


3.Click on install in the result that named as NetBeans IDE.


4.Download and installation process will complete within few minutes.


5.Access NetBeans from Applications->Programming->NetBeans.


netbeans_for_software_development.png
 
ADMINISTRATOR
Učlanjen(a)
10.05.1971
Poruka
54.331
mac theme for ubuntu 10.04-10.10

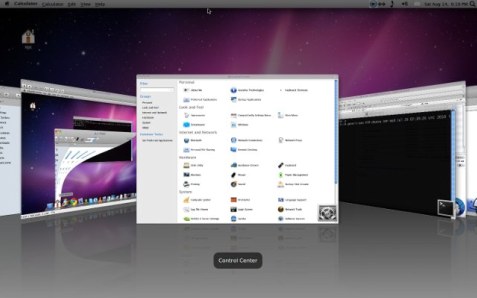
Ubuntu 10.04-Lucid Lynx uses GNOME as Default Desktop.GNOME desktop is used by most of the Linux distros,it has lot of options,themes and features.You can customize it up to the level you want.In this post you will learn about installing Mac OSX theme on Ubuntu 10.04.For Ubuntu you can use Macbuntu which is Mac OS X transformation Pack pack specifically designed for Ubuntu.This Package contains all the system components to mimic Mac OS X appearance on Ubuntu 10.04.

macubuntu-snapshot.jpg


Installing Mac Theme on Ubuntu 10.04

#1. Download Mac Theme Package ‘Macbuntu’ from the link given below.


Download Macubuntu Package


#2. Extract the archive,it will create a Macbuntu-10.04 directory.


#3. Go to Macbuntu-10.04 directory,open terminal(CTRL+ALT+T) and run the ‘install.sh’ file(it’s a bash script) as regular user.The simple way is to “Drag the install.sh file and Drop it to Terminal,then press Enter”.Then follow some simple instructions.

rkjha@rkjha-desktop:~$ '/home/rkjha/extra-packages/Macbuntu-10.04/install.sh'

#4. That’s All…Now you can enjoy Mac OS X Theme on Ubuntu 10.04 Lucid Lynx.
 
ADMINISTRATOR
Učlanjen(a)
10.05.1971
Poruka
54.331
Basic web server- Ubuntu 10.10 Maverik Meerkat

We will show you how to create a basic web server. When I say basics, I mean that we will work only on the local environment, NO I will show in this video tutorial how to configure router, IP forwarding, .... we'll leave for another video. For this tutorial we are going to install the next pacages and dependencies:

  • php5
  • apache2
  • php5-mysql
To install it we execute the next comand:
Kod:
 sudo apt-get install php5 apache2 php5-mysql
Then install the package to the database server:

  • mysql-server
Kod:
sudo apt-get install mysql-server
We asked for the password you want to assign to the root user for the database server.

And finally the package for managing databases:

  • phpmyadmin
Kod:
sudo apt-get install phpmyadmin
We ask that we reconfigure server and choose "apache2" then asks the password for the database server (which is what we put in the mysql-server package) and finally we set the root password to access phpmyadmin.
Then we will check through a web browser http://localhost address and we should see "It works!"
Then go into phpmyadmin from "http://localhost/phpmyadmin" user "root" and password that you post.


Poslednja izmena od urednika:
Natrag
Top